If you're exhausted in having to repeatedly ask your kids to do the same thing over and over again, you're not alone.
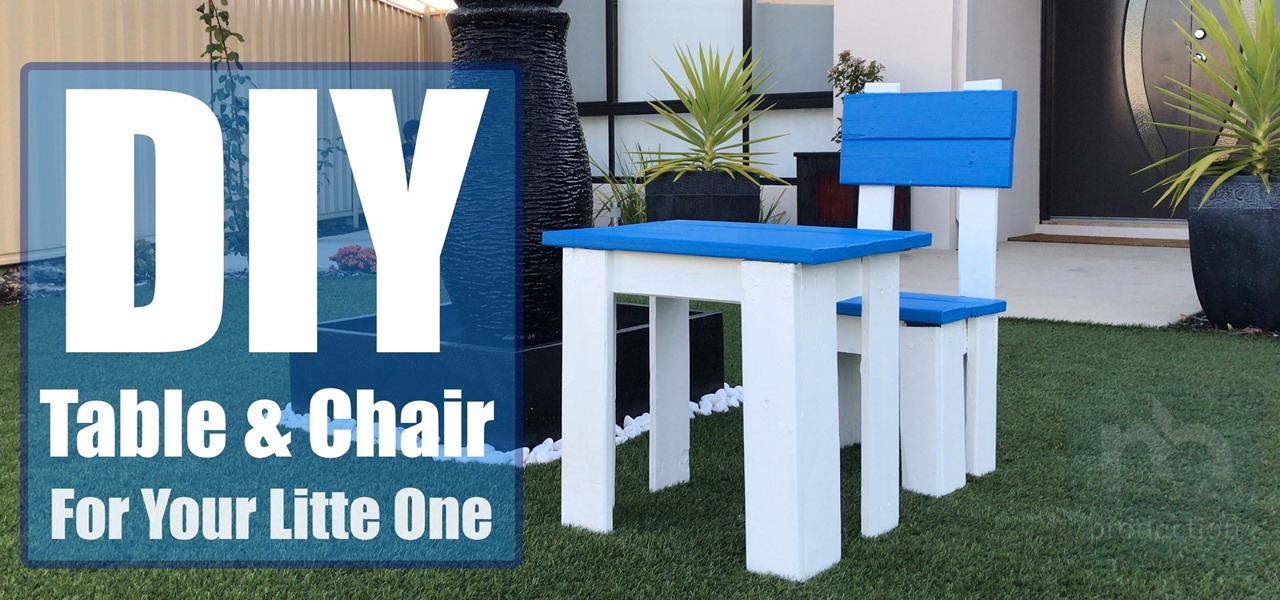
If your children always listen the first time you ask them to do something you can stop this video now!!!! Still here? You are your child's first and most important teacher. Every day you're helping your child learn new information, skills and ways of behaving and surviving in this world. Alright, so lets give them something that they can use to develop their capabilities and cope up with new situations and face challenges when they arise. Lets make a study table for them.
Step 1: Hardware Requirement

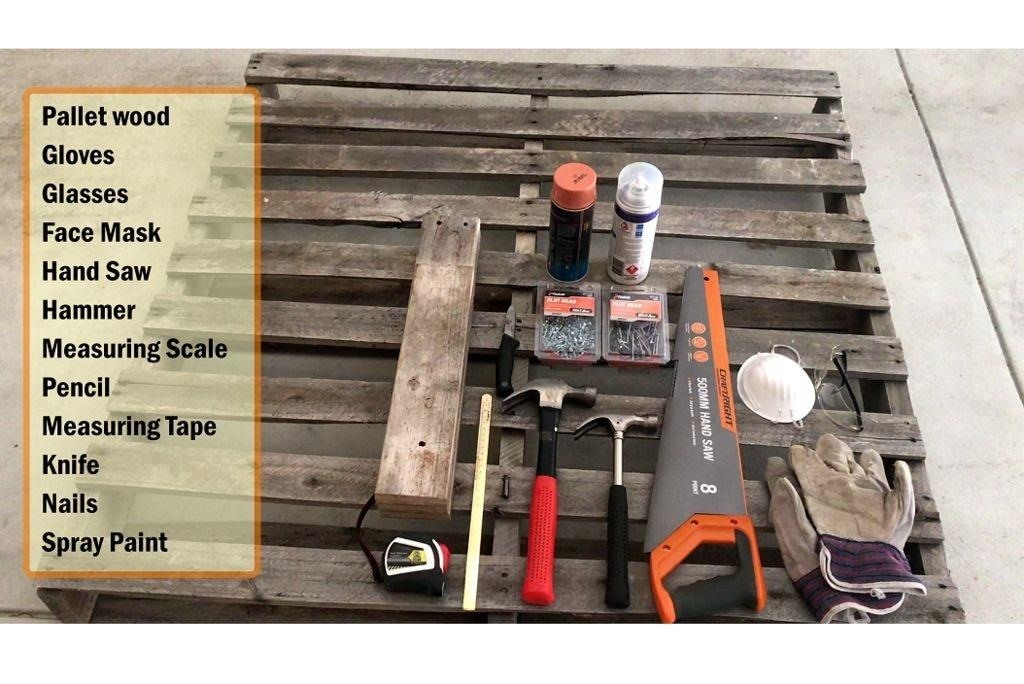
For this simple DIY project we need:
- Pallet wood
- Protective equipments like gloves
- Glasses
- Face Mask
- Hand Saw
- Hammer
- Measuring Scale
- Pencil - Measuring Tape
- Knife - Nails
- and Spray Paint of your choice
Step 2: Dismantling Pallet

Lets start by dismantling a pallet. I am going to use two hammers to dismantle the pallet and collect all the wood I need for this project.
My aim is to reuse all the nails used in building this pallet. So, I am going to save them and keep them aside.
Step 3: Plan for the Table

Lets start by building the table. I am going to build the table in 4 stages.
In stage 1 I am going to assemble the legs and keep them aside.
In stage 2 I am going to assemble the top section of the table.
Next I will be joining the sides that will be holding the legs of the table.
Finally, I will join the legs to the top section of the table.
Step 4: Wood Cutting

Using the hand saw and with proper measurements in mind, I am going to cut all the wood that is required for building this table.
After spending almost an hour, I have all the pieces ready in-front of me.
Step 5: Building the Table

As discussed in the plan I am going to assemble the legs of the table first.
By putting a piece of wood over the legs I will join them all together.
Then, we will join the pallets that will become the top of the table.
Next, I will join the side bits that will eventually hold the legs.
Once all the side bits are joined together, its time for us to join the legs to the top section of the table.
Look at that, with a bit of helping hand I have the table almost ready in-front of me.
Step 6: Plan for the Chair

Now, its time to join theNow that we have completed the table, its time for us to make a plan for the chair.
The chair will be completed in 5 stages: In stage 1 I am going to assemble the legs and keep them aside. In stage 2 the top sitting area will be assembled. Next I will be joining the sides that will be holding the legs of the chair. Then, I will join the legs to the top section of the chair. And finally, I will assemble and fix the back bit to the chair to the sitting area. In simple terms the sitting area of the chair is just a smaller version of the table, so the assembly will be exactly the same. pallets that will become the top of the table.
Step 7: Wood Cutting

With all the right measurements in mind lets start cutting the pallet wood.
After spending another hour in cutting, I have all the woods ready in front of me. This is for the sitting area, these are for the back bit and the rest is for the legs and its support.
Step 8: Building the Chair

Lets start by putting the legs together.
Once the legs are ready I will assemble the sitting area.
Then, its time for us to join the legs to the sitting area.
Once the sitting area is ready we need to assemble the back bit and then attach it to the sitting area.
Step 9: Sanding

OK, so now that we have both the table and the chair ready, its time for us to sand them and give them a smooth finish.
Step 10: Painting

After applying the wood primer I will paint both the chair and the table. I am going to apply two coats of paint on both the chair and the table and then let it dry for few hours.
Step 11: Hot Glue

Both of these items will be used inside the house so I don't want the wood to scratch the tiles of my floor. To avoid scratching I am going to apply some hot glue under the legs of the table.
Step 12: Display Outside

Look at that, looks great isn't it?
The best bit of any project is when you see it actually getting used by the people who it was made for. Then what you have just made gives you the feeling of - "MISSION ACCOMPALISHED".
Step 13: Thanks
Thanks again for watching this video. I hope it helps you.
If you want to support me you can subscribe to my channel and watch my other videos. Thanks ca again in my next video, bye now.


Be the First to Respond
Share Your Thoughts