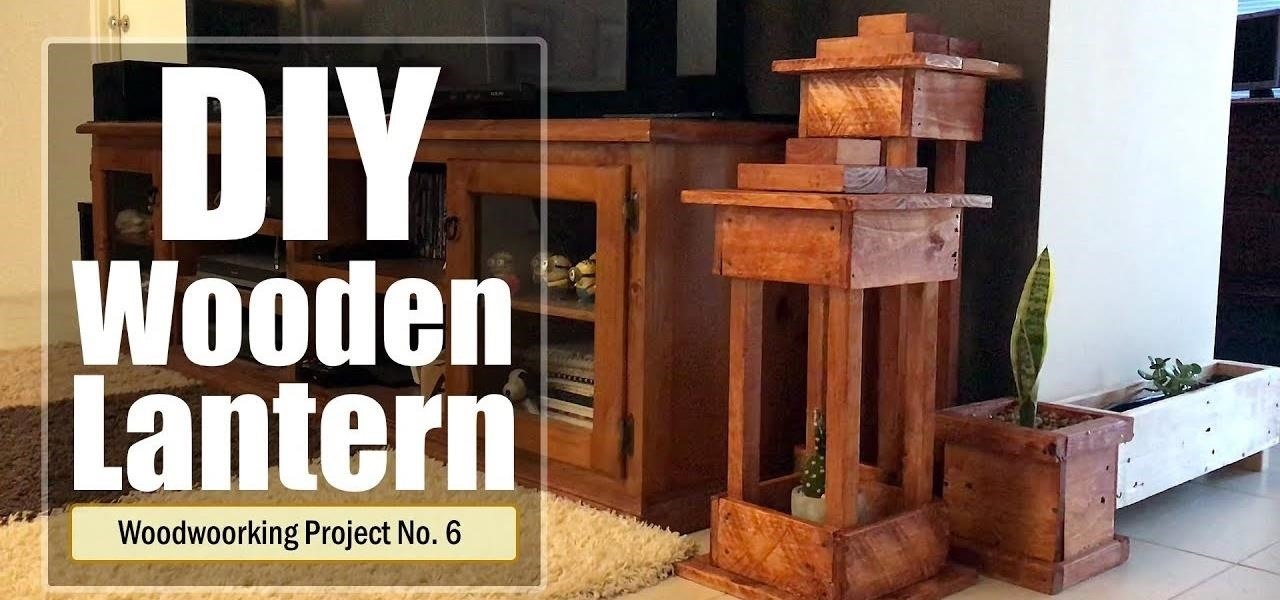

DIY - Wooden Lantern
If you are an enthusiast or a woodworker, you are probably in search of simple scrap wood projects all the time!
I don't know about you, but I have tons of scrap wood and this little project was a great way to use some of it! In this project I am going to make a simple wooden lantern for our living room.
Step 1: Hardware Requirement

For this project we need:
Pallet Wood
Protective equipment like gloves
Face mask
Glasses
Handsaw or Chop-saw
Hammer
Pliers
Pencil
Measuring Tape
Sanding Tool
Nails
and Paint of your choice
Step 2: Dismantling Pallet
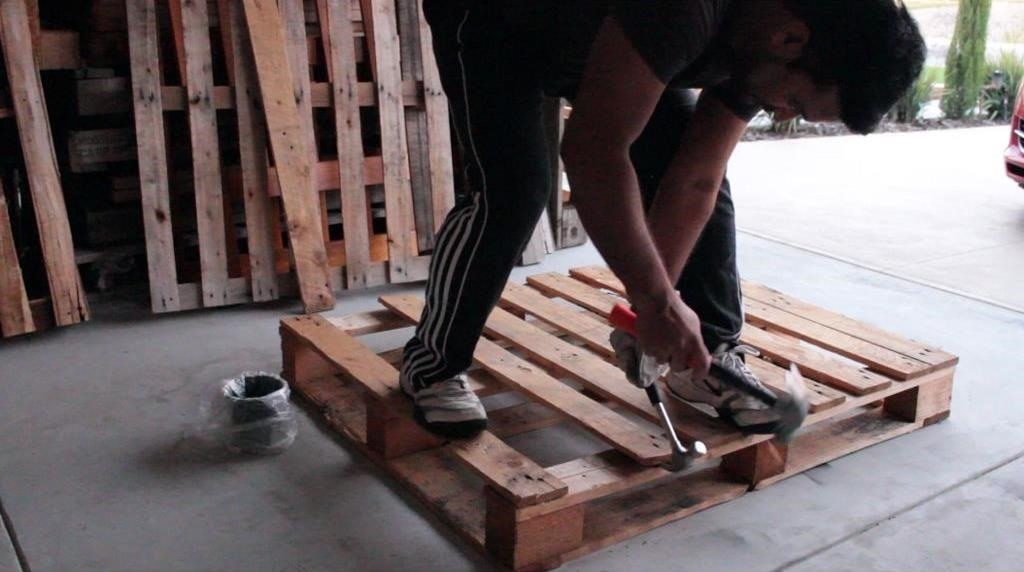
Using 2 hammers I am dismantling the pallet and saving all the nails that are used in building this pallet.
The word "lantern" comes via French from Latin "lanterna", possibly itself derived from Greek. Todays, English-speaking world use the term lantern to describe many types of portable lighting, but lanterns originated as a protective enclosure for a light source—usually a candle or a wick in oil—to make it easier to carry and hang up, and more reliable for outdoors or in drafty interiors.
Step 3: Wood Cutting
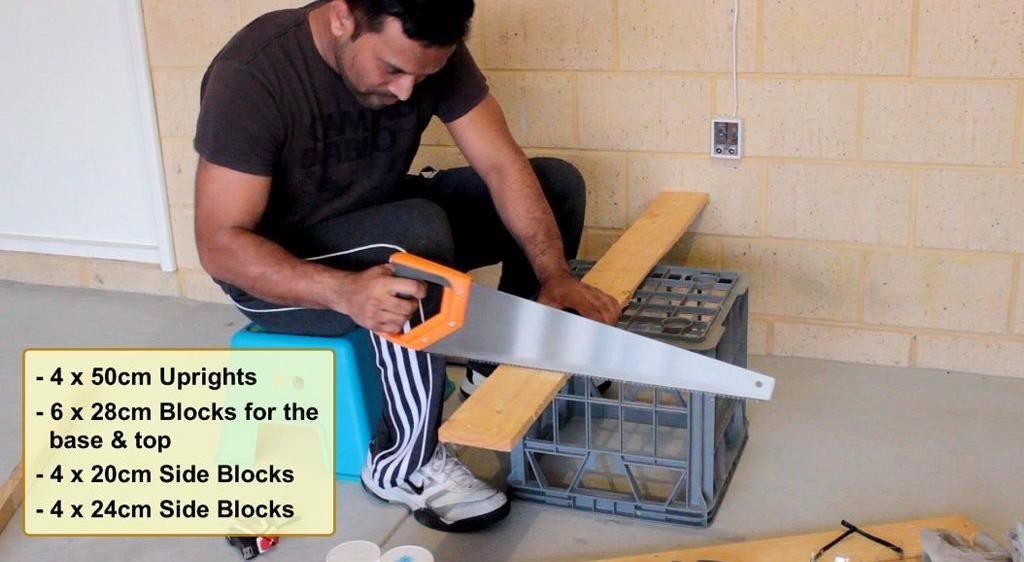
Lets start by cutting all the wooden pieces required for this project.
In total I need:
4 x 50cm uprights
6 x 28cm blocks for the base & top
4 x 20cm side blocks, 2 for the top and 2 for the bottom
4 x 24cm side blocks again 2 for the top and 2 for the bottom.
As we start putting all the pieces together I will explain why we need 4 x 20cm and 4 x 24cm side-block and not all of the same width.
Step 4: Assembling
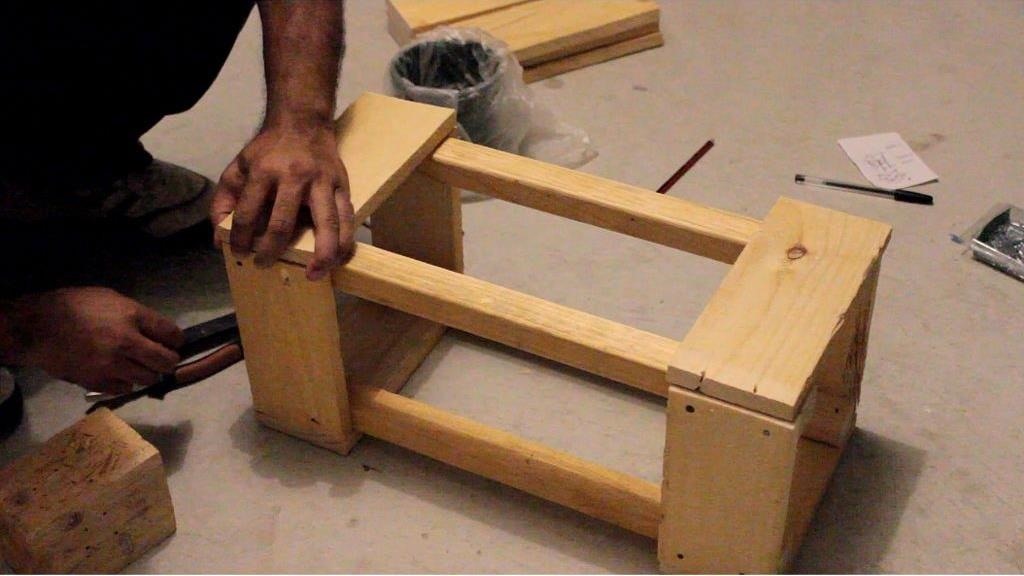
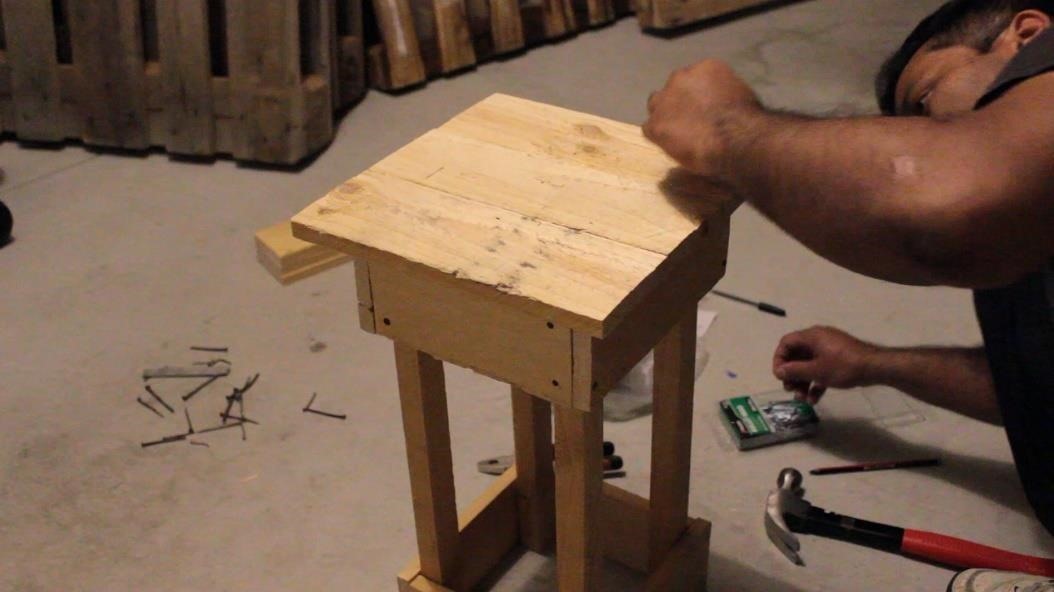
First of all, I am going to join the 4 uprights, 2 at a time using the 2 x 20cm blocks.
Then using the 4 x 24cm blocks I will join them all together. The pallets have 2cm thickness so I am keeping the extra 4cm to cover the sides. Once the frame is ready its time for us to assemble the top and the bottom of the unit.
Though lantern are primarily used to prevent a burning candle or wick being extinguished from wind, rain or other causes, another important function is to reduce the risk of fire; Should a spark leap from the flame or the light be dropped. In the past, this was especially important below the deck of a ship: a fire on a wooden ship was a major catastrophe.

Now, this is how it looks like.
This top cover will sit on the top of this unit to give this project nicer look.
Step 6: Sanding and Painting
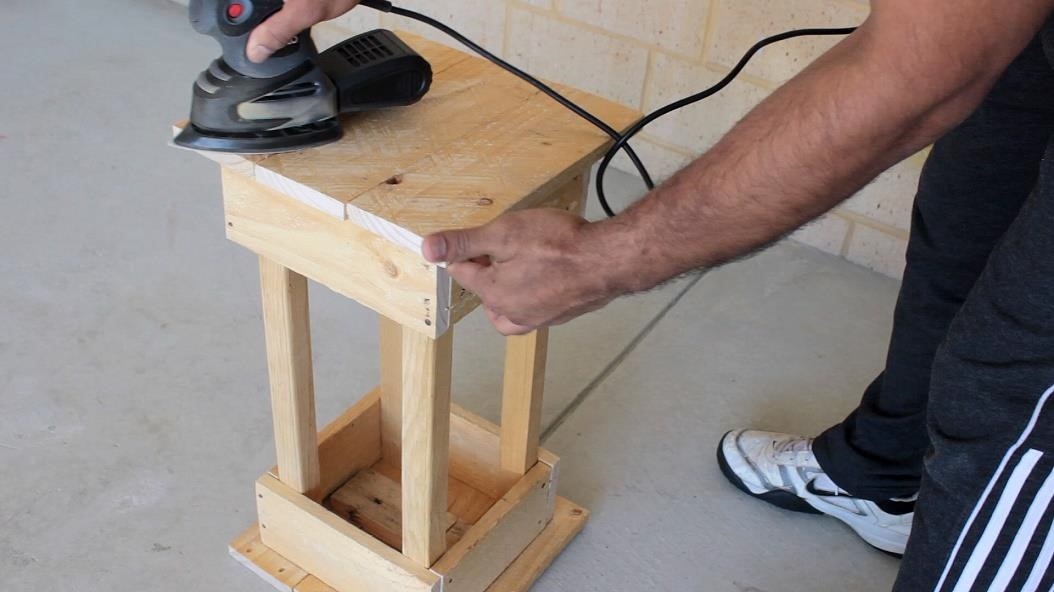
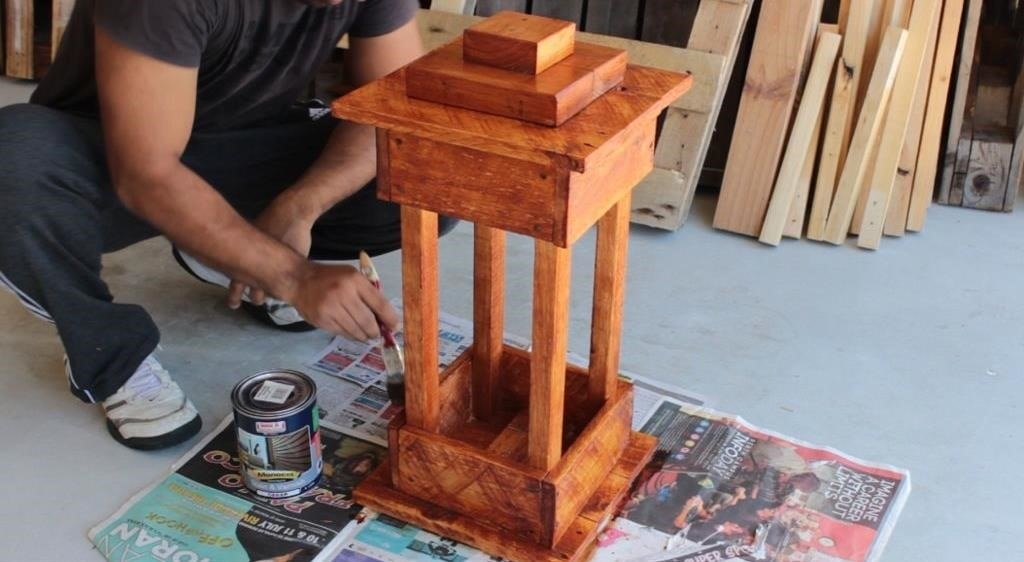
Wallah, just before applying the stain or paint I am going to sand this unit to give it a nice and smooth finish. Once sanded, its time for us to apply the paint on it.
Thanks
This is another beautiful creation of the wood pallet that is recycled into an excellent piece work. It is bringing out an outstanding impression in your living room that looks so royal. To give your living room a catchier effect for others, do make it as part of your house now.
Thanks again for checking out my tutorial. I hope it helps you.
If you want to support me subscribe to my YouTube Channel (youtube.com/user/tarantula3) for more updates.
Thanks ca again in my next tutorial.


Be the First to Respond
Share Your Thoughts